How to integrate your Roslyn Analyzer project with SonarQube
What are Roslyn Analyzers used for? To sum up, Roslyn Analyzers are used to analyze your app source code to find issues and suggest corrections.
If you work regularly with .NET you probably heard about them, and if not, then it’s quite possible that you have been used them without knowing it.
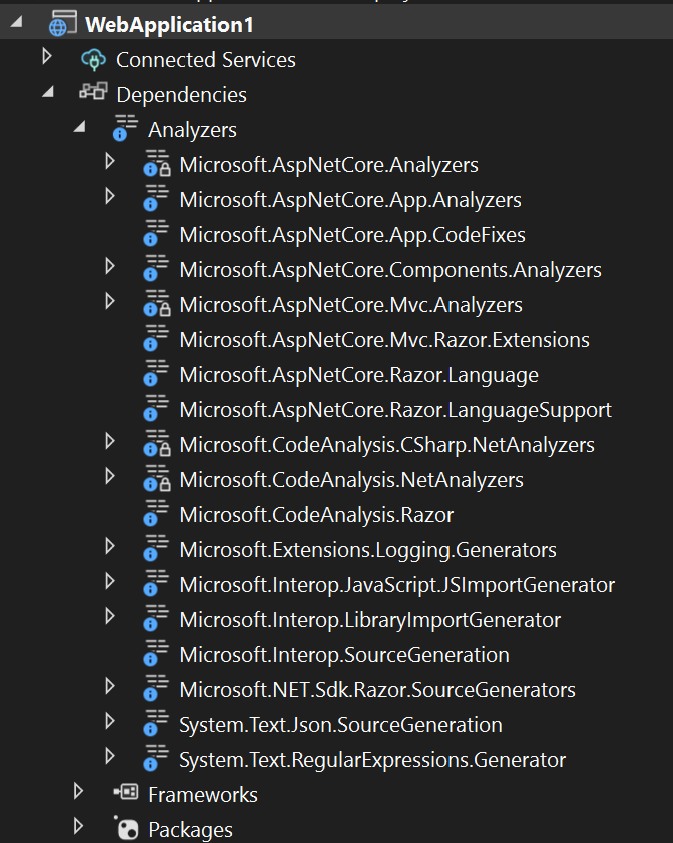
Starting in .NET 5, some Roslyn Analyzers packages are included with the .NET SDK, which means that when you create a new .NET app, you’ll see that it comes with some of them already preconfigured from the get-go.
If we use Visual Studio to take a look at which Roslyn Analyzers packages comes with a newly created .NET 7 API, this is what you’ll see:
Currently you don’t see much talk about Roslyn Analyzers, but they are still the “de facto” way when you want to perform any kind of custom static analysis in your source code.
On the other hand, SonarQube is one of the most well-known tools for performing static code analysis, it comes prepacked with a huge array of csharp rules to try to enforce coding best practices, security, maintainability, etc.
Now imagine that we’ve come up with our own set of coding rules for our application, we’ve built a Roslyn Analyzer library that implements those rules and we want to integrate them with SonarQube, so that issues detected by those rules can be reported and managed in SonarQube.
What available options do we have if we want to integrate a Roslyn Analyzer library with SonarQube?
Nowadays there are 2 ways to add your Roslyn Analyzer rules to SonarQube:
- Create a Java plugin from a Roslyn Analyzer library and install it into SonarQube.
- Import into SonarQube the issues report generated by a Roslyn Analyzer library.
In this post I want to show you how both integrations work, and also what’re the pros and cons of one over the other.
Create a Java plugin from a Roslyn Analyzer library and install it into SonarQube
One way to integrate a Roslyn Analyzer library with SonarQube is to create a plugin from it, and then install the plugin into SonarQube.
To generate a SonarQube plugin from a Roslyn Analyzer library you need to do the following steps:
- Package your Roslyn Analyzer library into a NuGet package.
- Use the
RoslynSonarQubePluginGeneratortool to convert the NuGet package into a SonarQube plugin.- The generator tool can be found here.
Then the SonarQube plugin must be installed into your SonarQube instance, to install it you just need to put the plugin in the SonarQube server /extensions/plugins folder and restart the server.
After installing the plugin, a new repository containing all the rules defined on your Roslyn Analyzer library will appear on SonarQube. From now on, these custom rules can be associated with a Quality Profile, just like any other SonarQube rule.
Let me show you an example.
Integration Example
Step 1: Create the SonarQube plugin
I have built, packed and published to nuget.org a Roslyn Analyzer library in advance. The library contains a simple (and stupid) rule that reports a diagnostic if a class name contains lowercase letters.
- You can find the Roslyn Analyzer library source code on my Github repository.
- You can get the NuGet package from nuget.org.
The first step is to convert the NuGet package that contains the roslyn rules into a SonarQube plugin, to do that you need to download the RoslynSonarQubePluginGenerator tool from here and run the following command:
./RoslynSonarQubePluginGenerator.exe /a:MyRoslynAnalyzer /acceptLicenses
The tool will create a .jar file named after the package name and version in the current directory e.g. myroslynanalyzer-plugin-1.0.0.jar

Step 2: Install the plugin in your SonarQube instance
To install the plugin:
- If you’re running SonarQube on a virtual machine, you need to put the .jar file in the
/extensions/pluginsfolder and restart the server. - If you’re running SonarQube on a container, the easiest way is to create a new sonarqube image that contains the plugin, something like this:
FROM sonarqube:9.9.0-community
COPY * /opt/sonarqube/extensions/plugins/
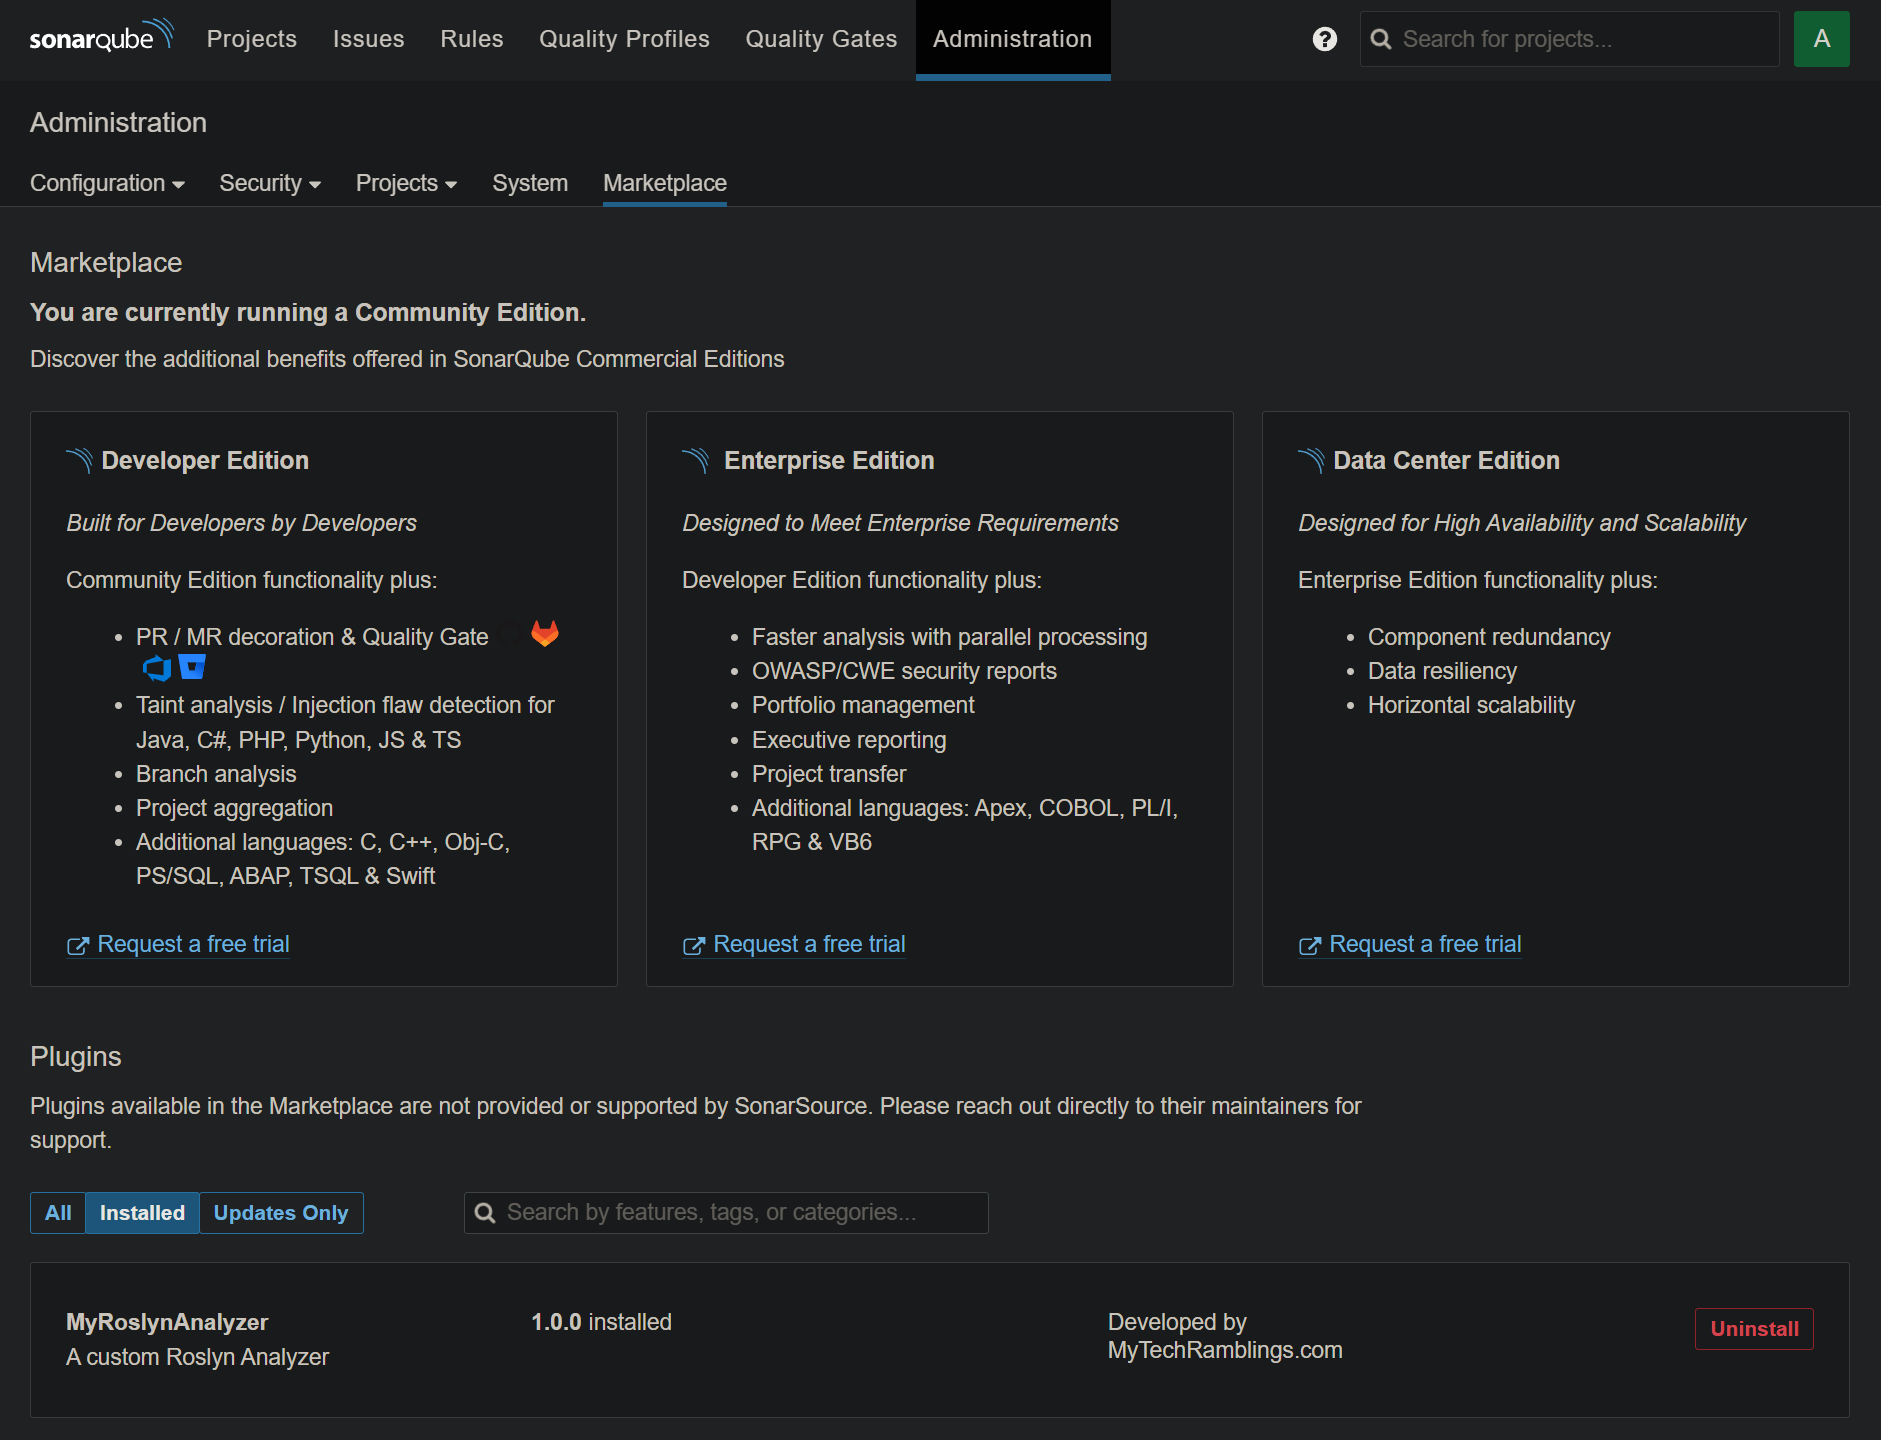
You can take a look at the plugins installed going to the “Administration” section of your SonarQube instance, the rules plugin must show up here, if it doesn’t then you did something wrong.
Step 3: Configure your Quality Gates to use the Roslyn rules
Now that you have installed the plugin on your SonarQube server, it is time to configure the custom rules on SonarQube.
In the “Rules” section, if you search by repository name, you’ll find your custom rules.
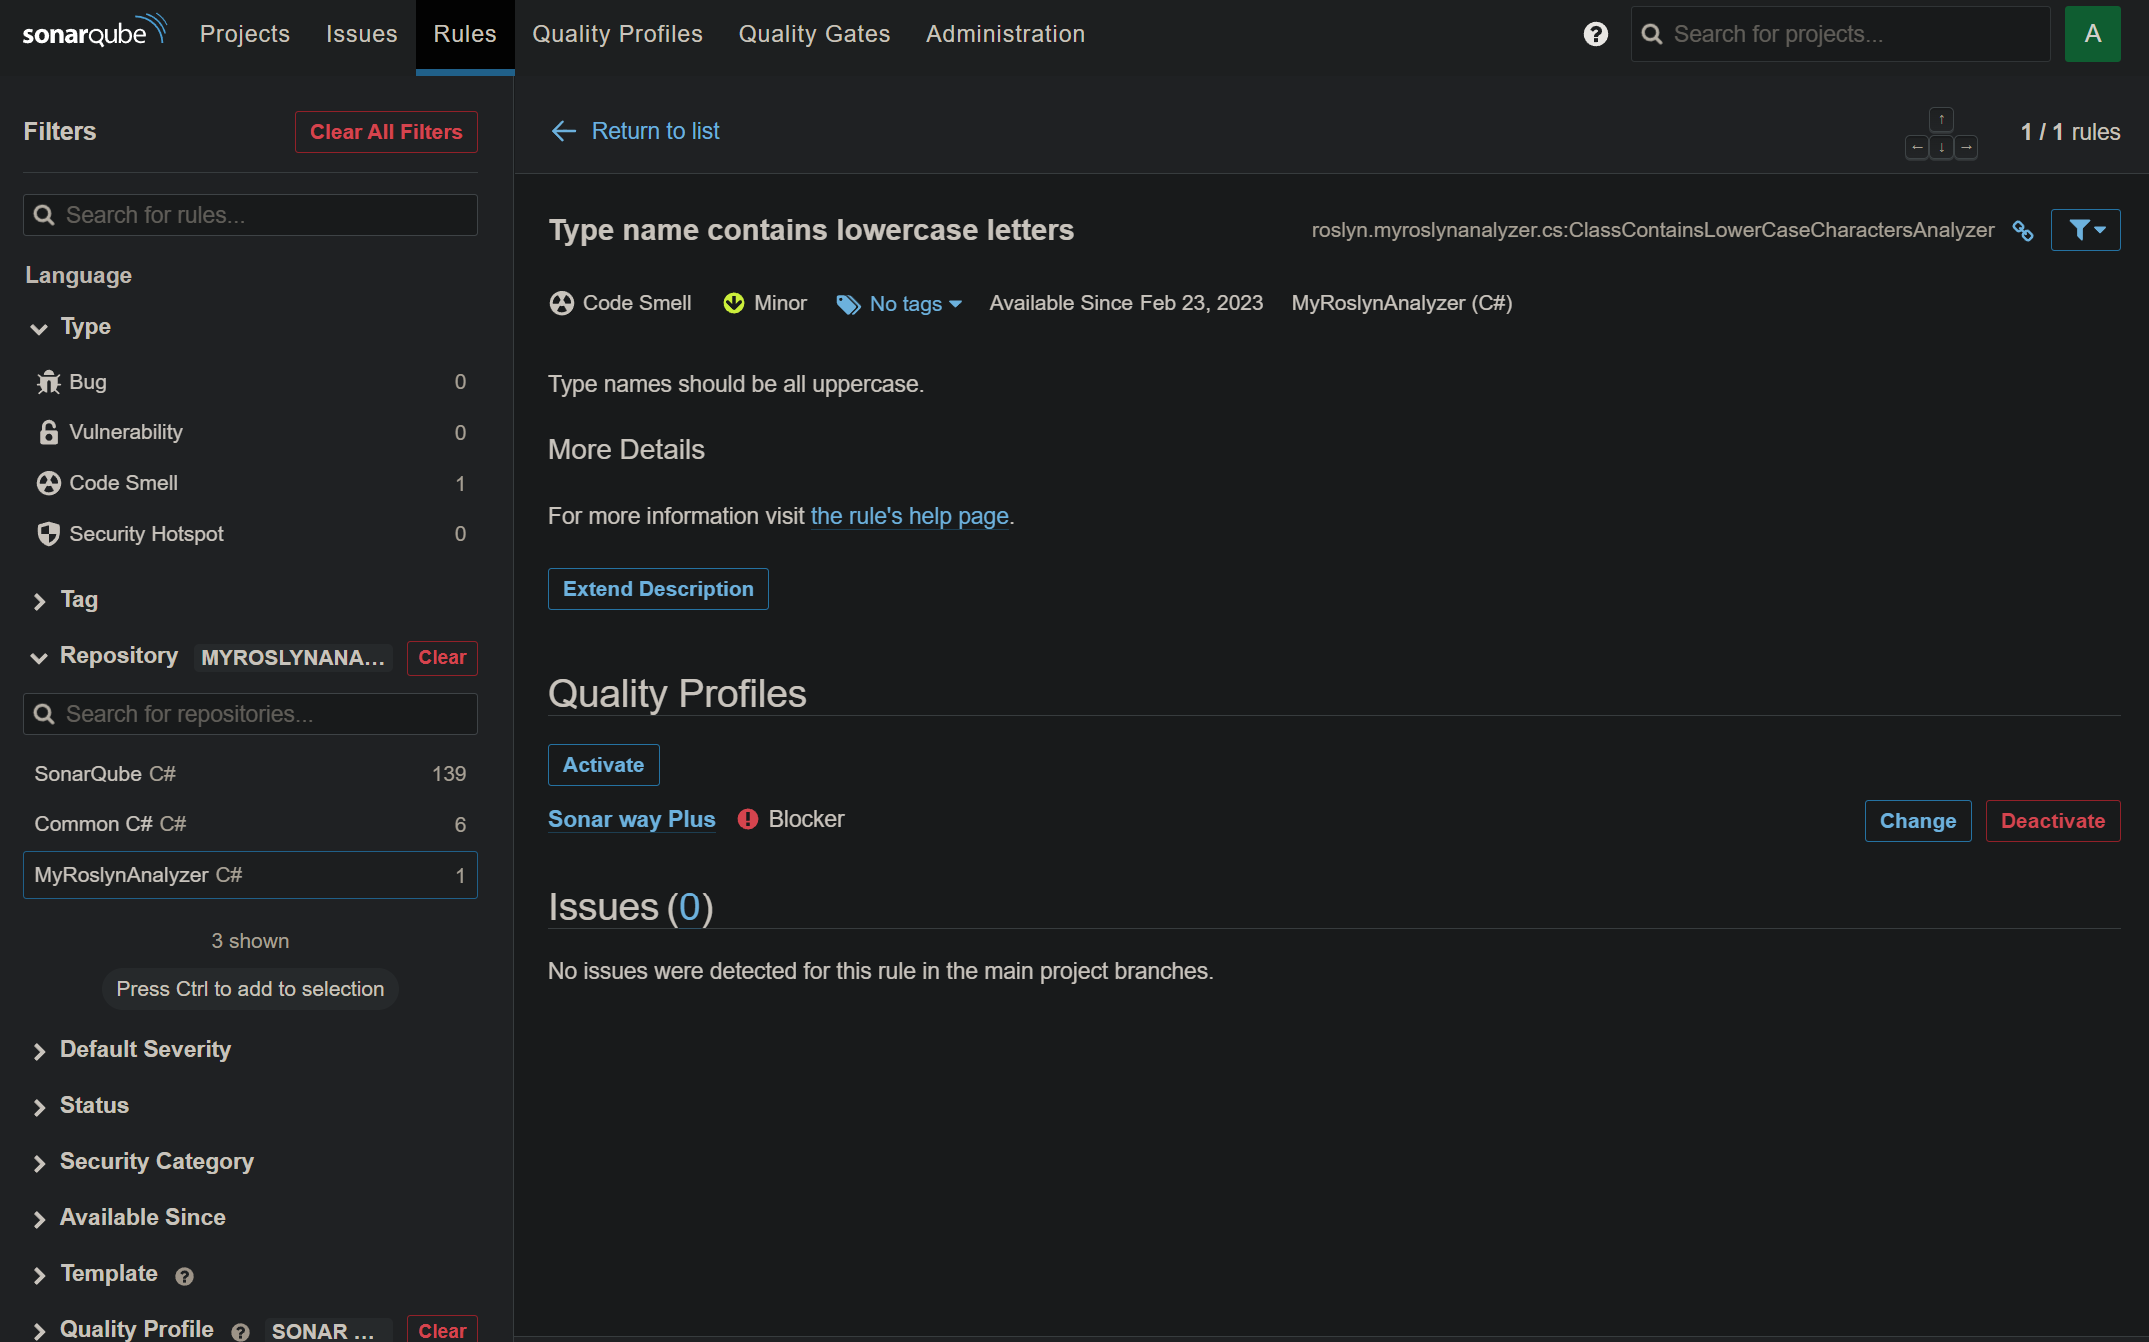
Now you can associate any of those custom rules with a Quality Profile, just like any other SonarQube rule.
Step 4: Run a scan
The last step will be to analyze a .NET application to test that the custom rules get triggered as expected.
- The app source code I will use to perform this test can be found on my Github repository.
- To perform a SonarQube scan I will use the SonarScanner CLI tool.
The next code snippet shows an example of how to perform a SonarQube scan using the SonarScanner command tool and the .NET CLI:
dotnet sonarscanner begin /k:"MyDemo.WebApi" /d:sonar.login="sqa_4278ef757202aaa56f0b632344a966be85a9383b" /d:sonar.host.url="http://localhost:9000"

dotnet build

dotnet sonarscanner end /d:sonar.login="sqa_4278ef757202aaa56f0b632344a966be85a9383b"
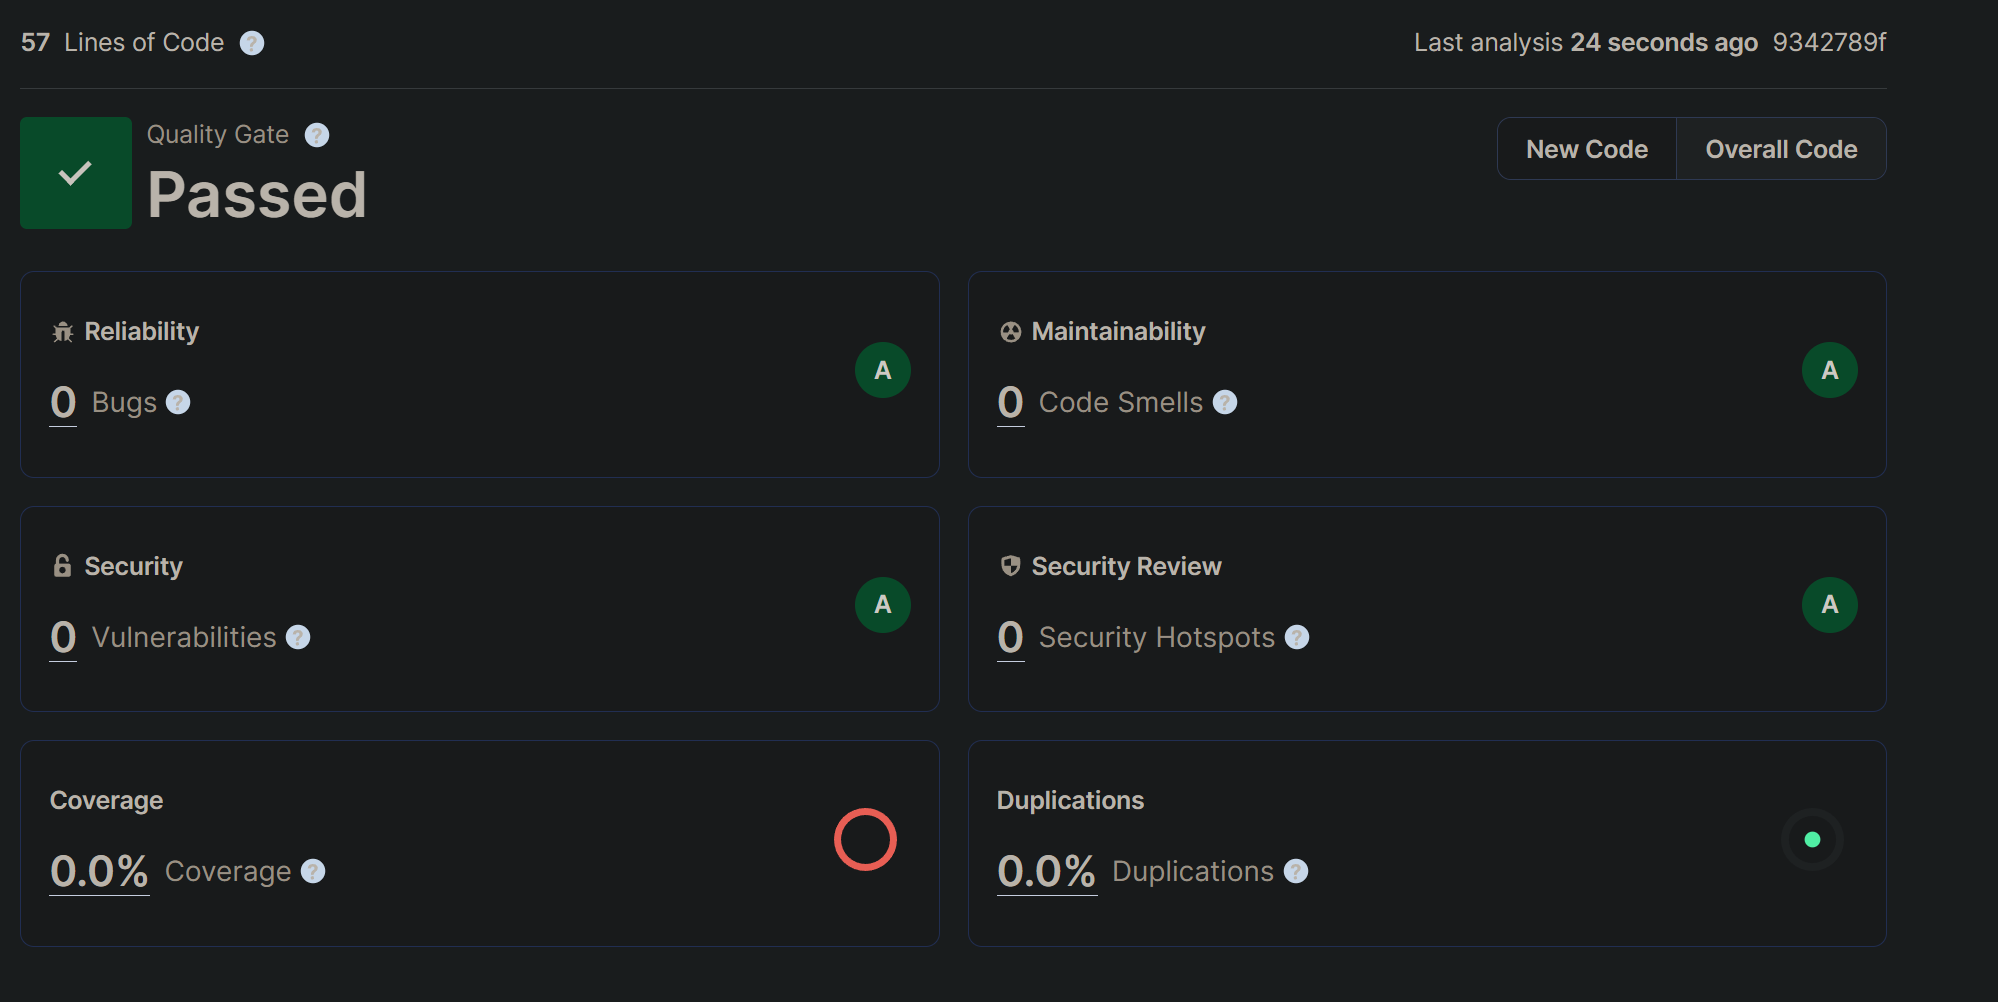
If we inspect the result of the analysis on SonarQube, we’ll see that the rules from the plugin where triggered as expected.
Pros and cons
Let’s discuss what’re the pros and cons of using this integration.
Pros
- The possibility to configure the Roslyn rules in SonarQube (Add those rules to a particular Quality Gate, set the Error level, etc).
- There is no need to install the Roslyn Analyzer library on the target application. Only need to associate your application with a Quality Gate that has the Roslyn rules enabled.
Cons
- Don’t work with SonarCloud, it only works with SonarQube.
- Depends on an external tool to generate a compatible SonarQube plugin.
- To install or update the plugin you must tinker with the SonarQube server file system.
- The SonarQube scan result might be not be totally accurate if your Roslyn rule doesn’t specify a location (more information in the “What happens if a Roslyn rule has no location set?” section).
Import into SonarQube the issues report generated by the Roslyn Analyzer library
Another way to integrate a Roslyn Analyzer library with SonarQube is to import the issues report generated by your Roslyn Analyzer library into SonarQube.
This is a really simply process with only 2 steps:
- Package your Roslyn Analyzer library into a NuGet package.
- Install the resulting NuGet package on your .NET app.
Once the package gets installed on your app, the issues generated from your Roslyn Analyzer library are included in the MSBuild output and imported into SonarQube when a Sonar scan is performed.
This integration is easier than the previous one, but lacks some features (such as being able to control the rules execution by inclusion in a Quality Profile).
Let me show you an example.
Integration Example
Step 1: Install the Roslyn Analyzer NuGet in the target application
I have built, packed and published to nuget.org a Roslyn Analyzer library in advance. The library contains a simple (and stupid) rule that reports a diagnostic if a class name contains lowercase letters.
- You can find the Roslyn Analyzer library source code on my Github repository.
- You can get the NuGet package from nuget.org.
The fist step is to install the Roslyn Analyzer NuGet package into the target application.
The next code snippet shows how the .csproj file looks like after installing the Roslyn Analyzer NuGet package.
<Project Sdk="Microsoft.NET.Sdk.Web">

  <PropertyGroup>
    <TargetFramework>net7.0</TargetFramework>
    <Nullable>enable</Nullable>
    <ImplicitUsings>enable</ImplicitUsings>
  </PropertyGroup>

  <ItemGroup>
    <PackageReference Include="Microsoft.AspNetCore.OpenApi" Version="7.0.3" />
    <PackageReference Include="MyRoslynAnalyzer" Version="1.0.0">
      <PrivateAssets>all</PrivateAssets>
      <IncludeAssets>runtime; build; native; contentfiles; analyzers; buildtransitive</IncludeAssets>
    </PackageReference>
    <PackageReference Include="Swashbuckle.AspNetCore" Version="6.4.0" />
  </ItemGroup>

</Project>
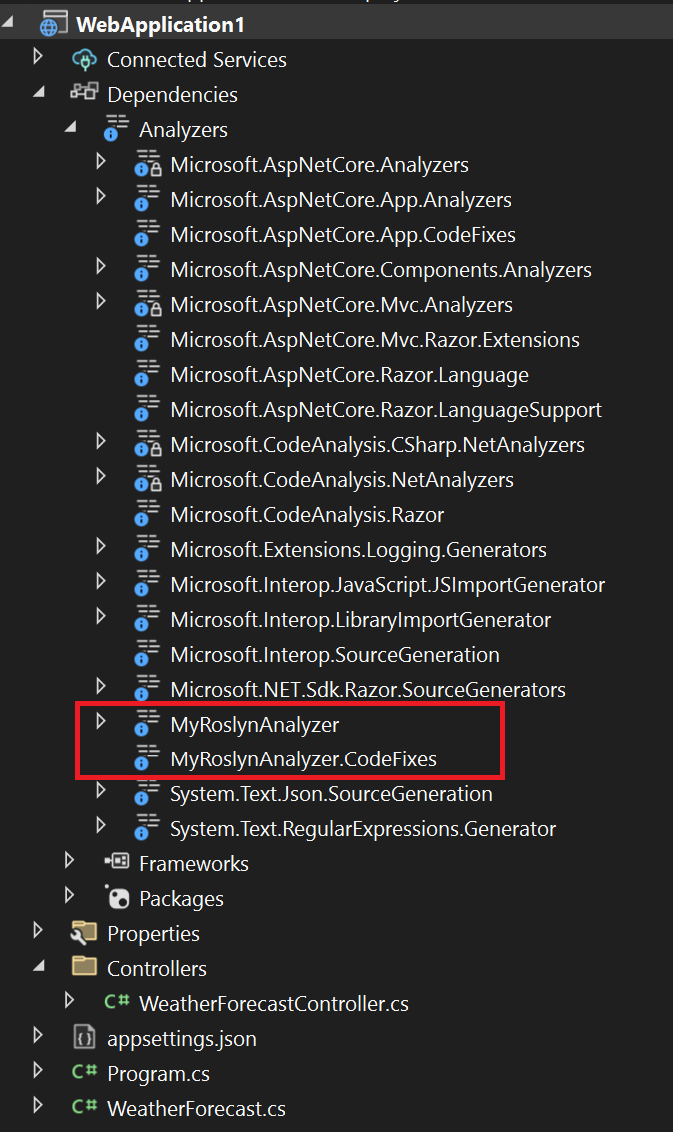
Using Visual Studio you can browse which Roslyn Analyzer packages are installed on your target application. After installing the NuGet package on the target application, it will be listed on the “Dependencies > Analyzers” section.
Step 2: Run a scan
The second and last step is perform a scan on a .NET application to test that the custom rules are imported into sonarQube as expected.
- The app source code I will use to perform this test can be found on my Github repository.
- To perform a SonarQube scan I will use the SonarScanner CLI tool.
If we execute a dotnet build command after installing the package containing the rules, we will see the rules result on the MSBuild output.
When a SonarQube scan is executed, the MSBuild output gets imported by default into SonarQube, and as you can see in the above screenshot the MSBuild output contains the output of the Roslyn rules, this is the reason of why this integration works.
The next code snippet shows an example of how to perform a scan using the SonarScanner command tool and the .NET CLI.
dotnet sonarscanner begin /k:"MyDemo.WebApi" /d:sonar.login="sqa_4278ef757202aaa56f0b632344a966be85a9383b" /d:sonar.host.url="http://localhost:9000"

dotnet build

dotnet sonarscanner end /d:sonar.login="sqa_4278ef757202aaa56f0b632344a966be85a9383b"
If we inspect the result of the analysis on SonarQube, we’ll see that the rules from the NuGet package where imported succesfully into SonarQube.
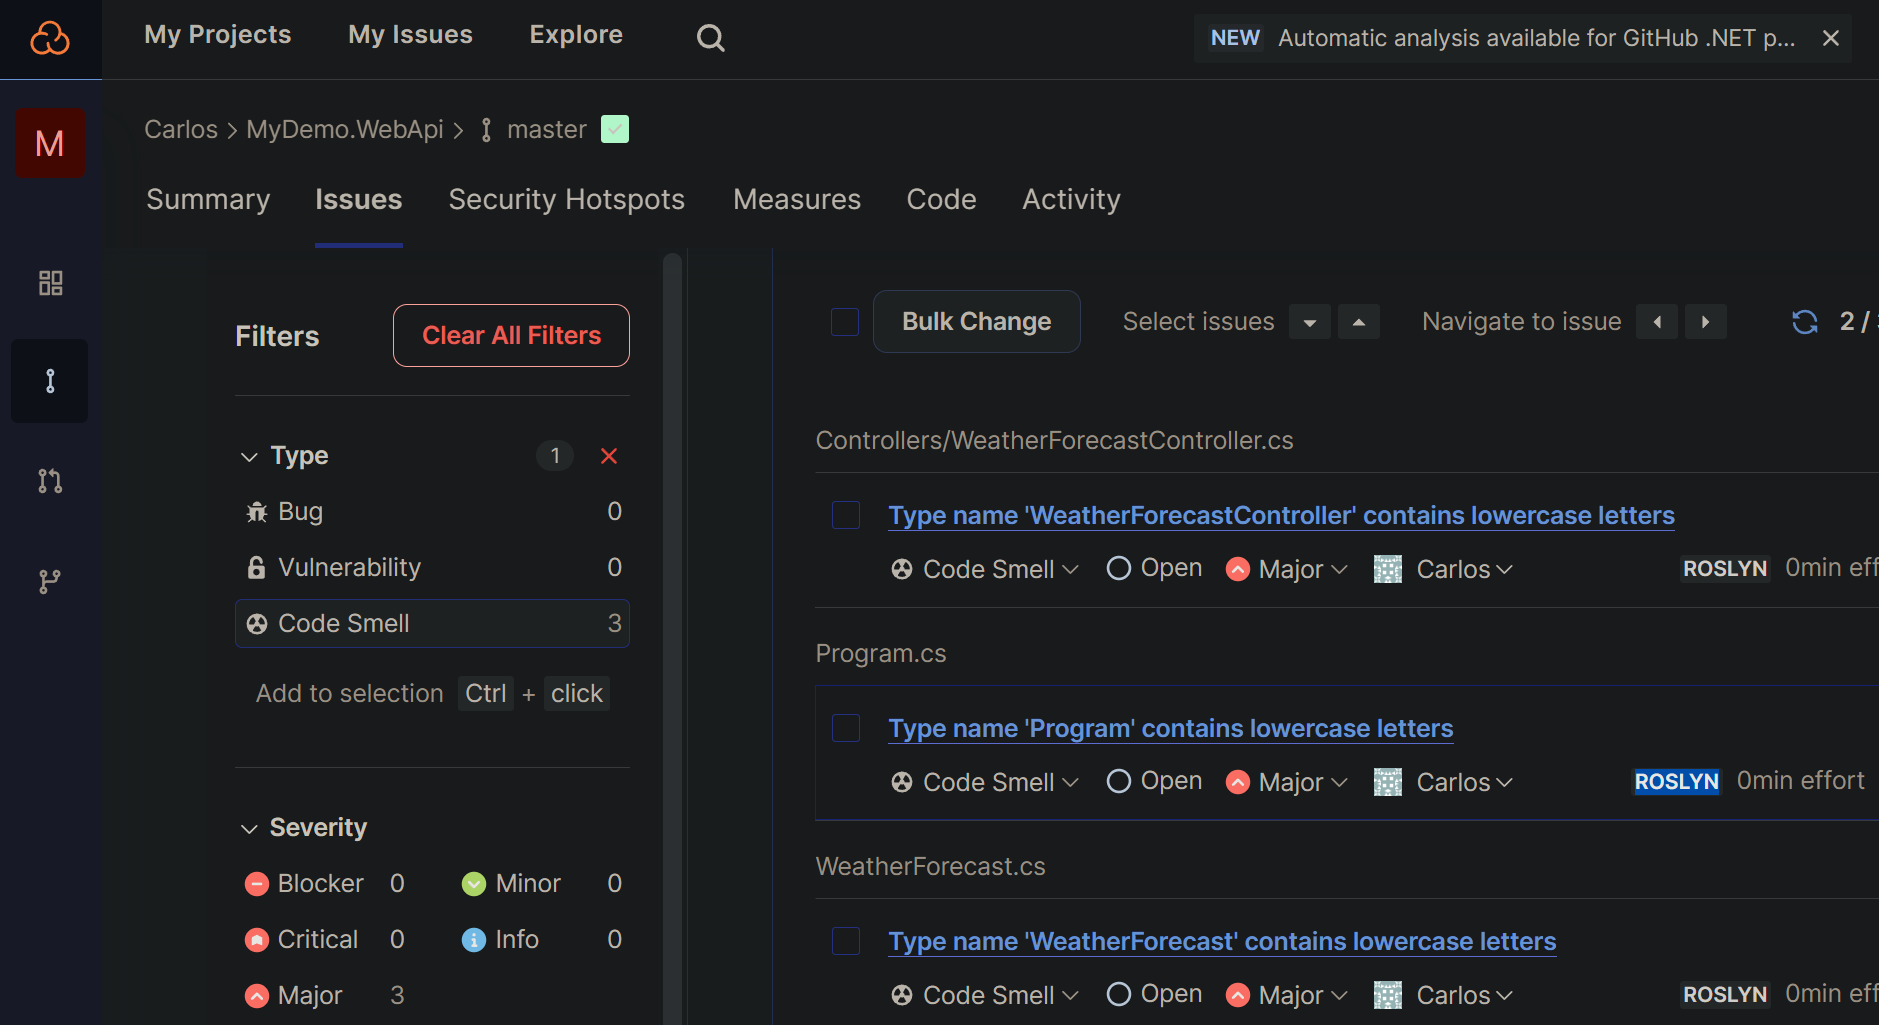
One of the biggest disadvantages when using the previous integration was the fact that it didn’t work with SonarCloud. This approach can be used with both: Sonarcloud and SonarQube.
The next screenshot shows the result of the previous analysis on SonarCloud instead of SonarQube.
Pros and cons
Let’s discuss what’re the pros and cons of using this integration.
Pros
- Very easy to implement.
- Works with both SonarQube and SonarCloud.
- No need to tinker with the SonarQube filesystem.
Cons
- Unable to configure anything on SonarQube. The issues are always reported as external issues.
- The Roslyn Analyzer NuGet packages must be installed on the target application. This integration relies solely in the fact that someone (or something) has installed the Roslyn Analyzer package on the target application before executing a Sonar scan.
- It doesn’t work if your Roslyn rule doesn’t specify a location (more information in the “What happens if a Roslyn rule has no location set?” section).
What happens if a Roslyn rule has no location set?
If someone knows a way to fix this issue, DM me on Github or Linkedin.
Take a look at this rule:
public class ClassContainsLowerCaseCharactersAnalyzer : DiagnosticAnalyzer
{
    public const string DiagnosticId = "MTR-001";

    private static readonly LocalizableString Title = new LocalizableResourceString(nameof(Resources.AnalyzerTitle), Resources.ResourceManager, typeof(Resources));
    private static readonly LocalizableString MessageFormat = new LocalizableResourceString(nameof(Resources.AnalyzerMessageFormat), Resources.ResourceManager, typeof(Resources));
    private static readonly LocalizableString Description = new LocalizableResourceString(nameof(Resources.AnalyzerDescription), Resources.ResourceManager, typeof(Resources));
    private const string Category = "Naming";
    private const string HelpLink = "https://www.mytechramblings.com";

    private static readonly DiagnosticDescriptor Rule = new DiagnosticDescriptor(DiagnosticId,
        Title,
        MessageFormat,
        Category,
        DiagnosticSeverity.Warning,
        isEnabledByDefault: true,
        description: Description,
        helpLinkUri: HelpLink);

    public override ImmutableArray<DiagnosticDescriptor> SupportedDiagnostics => ImmutableArray.Create(Rule);

    public override void Initialize(AnalysisContext context)
    {
        context.ConfigureGeneratedCodeAnalysis(GeneratedCodeAnalysisFlags.None);
        context.EnableConcurrentExecution();
        context.RegisterSymbolAction(AnalyzeSymbol, SymbolKind.NamedType);
    }

    private static void AnalyzeSymbol(SymbolAnalysisContext context)
    {
        var namedTypeSymbol = (INamedTypeSymbol)context.Symbol;

        if (namedTypeSymbol.Name.ToCharArray().Any(char.IsLower))
        {
            var diagnostic = Diagnostic.Create(Rule, Location.None);
            context.ReportDiagnostic(diagnostic);
        }
    }
}
It is a (stupid) rule that reports a diagnostic for every class name that contains a lowercase letter, but the important thing about this rule is the fact that when we create a diagnostic we are not reporting a specific location.
var diagnostic = Diagnostic.Create(Rule, Location.None);
context.ReportDiagnostic(diagnostic);
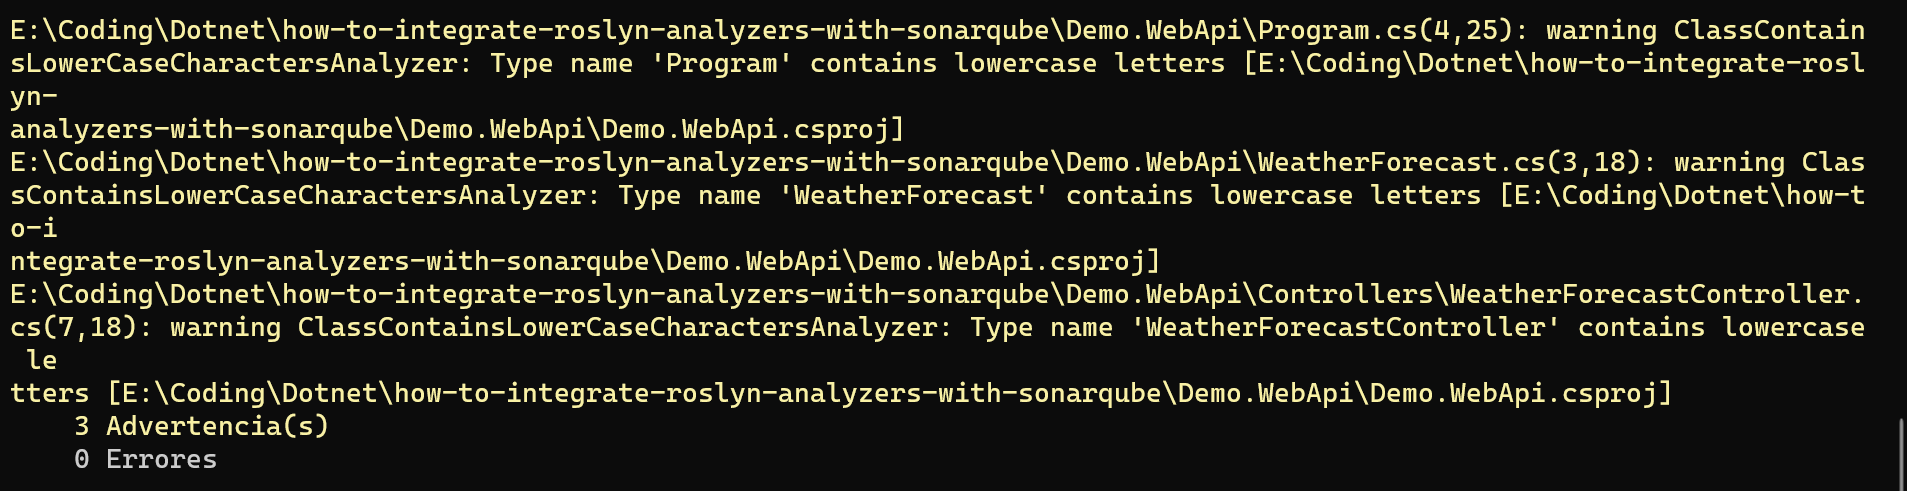
If we test the above Roslyn rule on a newly created .NET 7 API, here’s how the MSBuild output looks like:

As you can observe from the previous screenshot, the MSBuild output contains 3 warnings, but those warnings had no specific location.
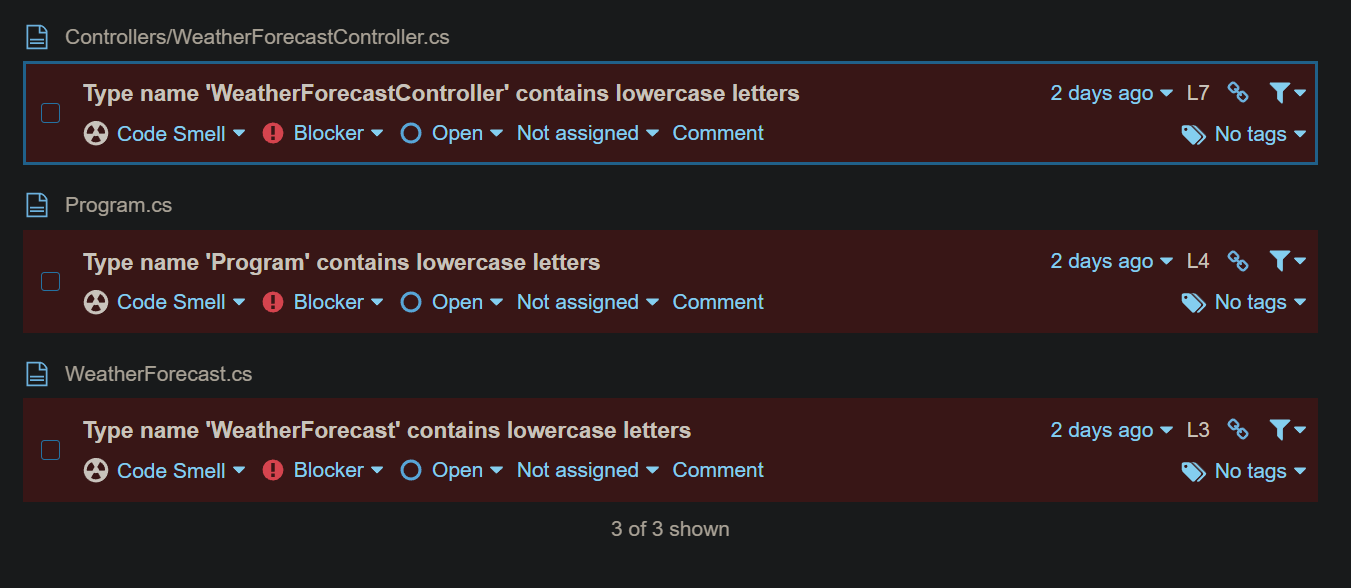
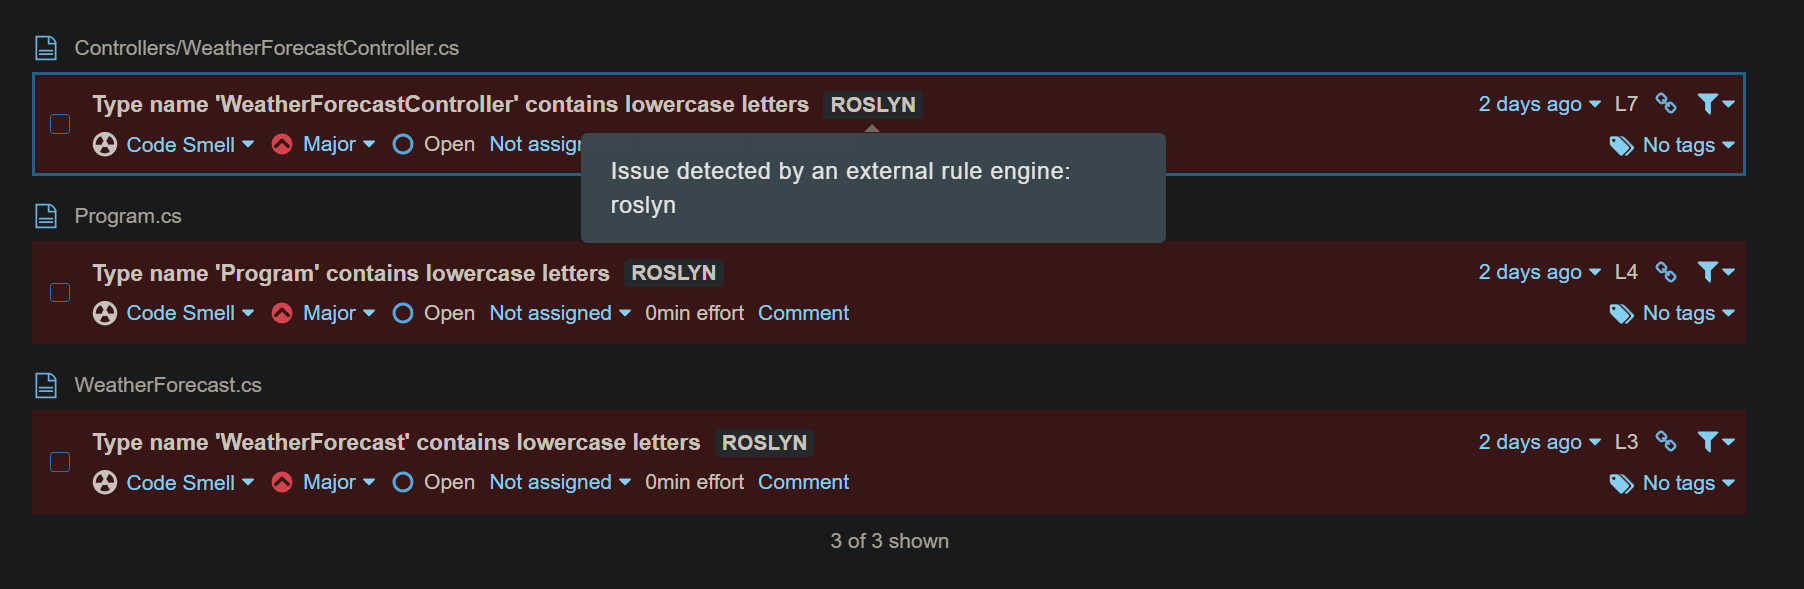
If we convert the above rule on a SonarQube plugin and then perform a scan, this is what we will see on SonarQube:

In the above screenshot, only 1 issue is present on SonarQube but the csharp compiler reported 3 warnings.
If try the second integration (package the above Roslyn rule inside a Nuget package and install it on a target application), the result is even worse, because no issue gets imported into SonarQube.
This seems a bug to me, if someone knows a way to fix this issue DM me on Github or Linkedin, but meanwhile keep this in mind if you want to integrate a Roslyn Analyzer library with SonarQube.