An opinionated list of tips for building .NET 8 app templates
When you install the .NET SDK, it comes equipped with a variety of templates that are readily available for your use. However, these templates are essentially bare, serving as a foundational starting point for your projects.
This implies that several elements need to be incorporated to make them truly production-ready. This is where having a set of prebuilt .NET templates with everything already pre-configured and all the necessary building blocks set up comes into play.
The recently announced .NET Aspire tries to fill this gap. It is an opinionated, cloud ready stack for building applications, offering a template that comes preconfigured with set of tools such as HealthChecks and OpenTelemetry. You can take a look at the Aspire templates in here
In the realm of enterprise development, I usually tend to find that there are a set of opinionated rules defined when you have to build an application.
These rules might dictate the use of specific application architectures (e.g. Clean Architecture or Vertical Slice) or mandate the utilization of certain custom NuGet packages for functionalities like logging or configuration.
This is where .NET Aspire has limitations, as, despite its well-implemented nature, it remains a generic template. Consequently, regardless of how robust .NET Aspire may be, it doesn’t cater to the specific, tailored needs of individual enterprises, this is where creating and using your own templates that enforce your organization’s rules becomes a valuable approach when starting the development of a new application.
I have been building .NET templates for quite some time and for multiple companies. As a result, I thought it might be helpful to compile a list of tips to consider when creating a .NET app template.
Keep in mind that this is an opinionated list, reflecting my own ideas. You may or may not agree with some of the points. Undoubtedly, what I consider important might not hold the same significance for you, and vice versa.
Furthermore, I’m sure I’ll overlook a few points that I consider crucial, but at the time of creating this list, they may have slipped my mind.
So, without further ado, let’s get started.
Don’t try to build a single template that does everything
The first tip is very simple. Don’t try to create a single template that does everything, like encompassing multiples architectures (e.g. Clean Architecture and N-layer Architecture) or multiple kind of apps (e.g. APIs and Worker Services).
Instead of that, it is much better to have several templates where each one fulfills a concrete objective. That way it is much more easy to maintain an update them.
When it comes to distributing the templates, it doesn’t matter if you have 1 or 10; the distribution process will be exactly the same. More info, in the next tip.
Pack all your .NET templates into a single NuGet package
The best way to distribute your custom .NET templates is via NuGet package. You can package as many templates as you want in a single package, but each template needs to have a .template.config folder at its root level.
Inside the .template.config folder you need to place at least a file named template.json. This file provides information about what the template engine should do with your template.
Within the NuGet package all the templates must be stored in the /content folder.
Here’s how the folder structure inside your .NET template package should look like:
---content
    +---TemplateA
    |   +---.template.config
    |   +---src
    |   \---test
    +---TemplateB
    |   +---.template.config
    |   +---src
    |   \---test
    \---TemplateC
        +---.template.config
        +---src
        \---test
Also, when you install or uninstall a template package, all templates contained in the package will be added or removed, respectively.
Once you have created your template package, you can upload it to your company’s feed (e.g., Azure Artifacts, GitHub Packages, Artifactory), allowing everyone to start using it right away.
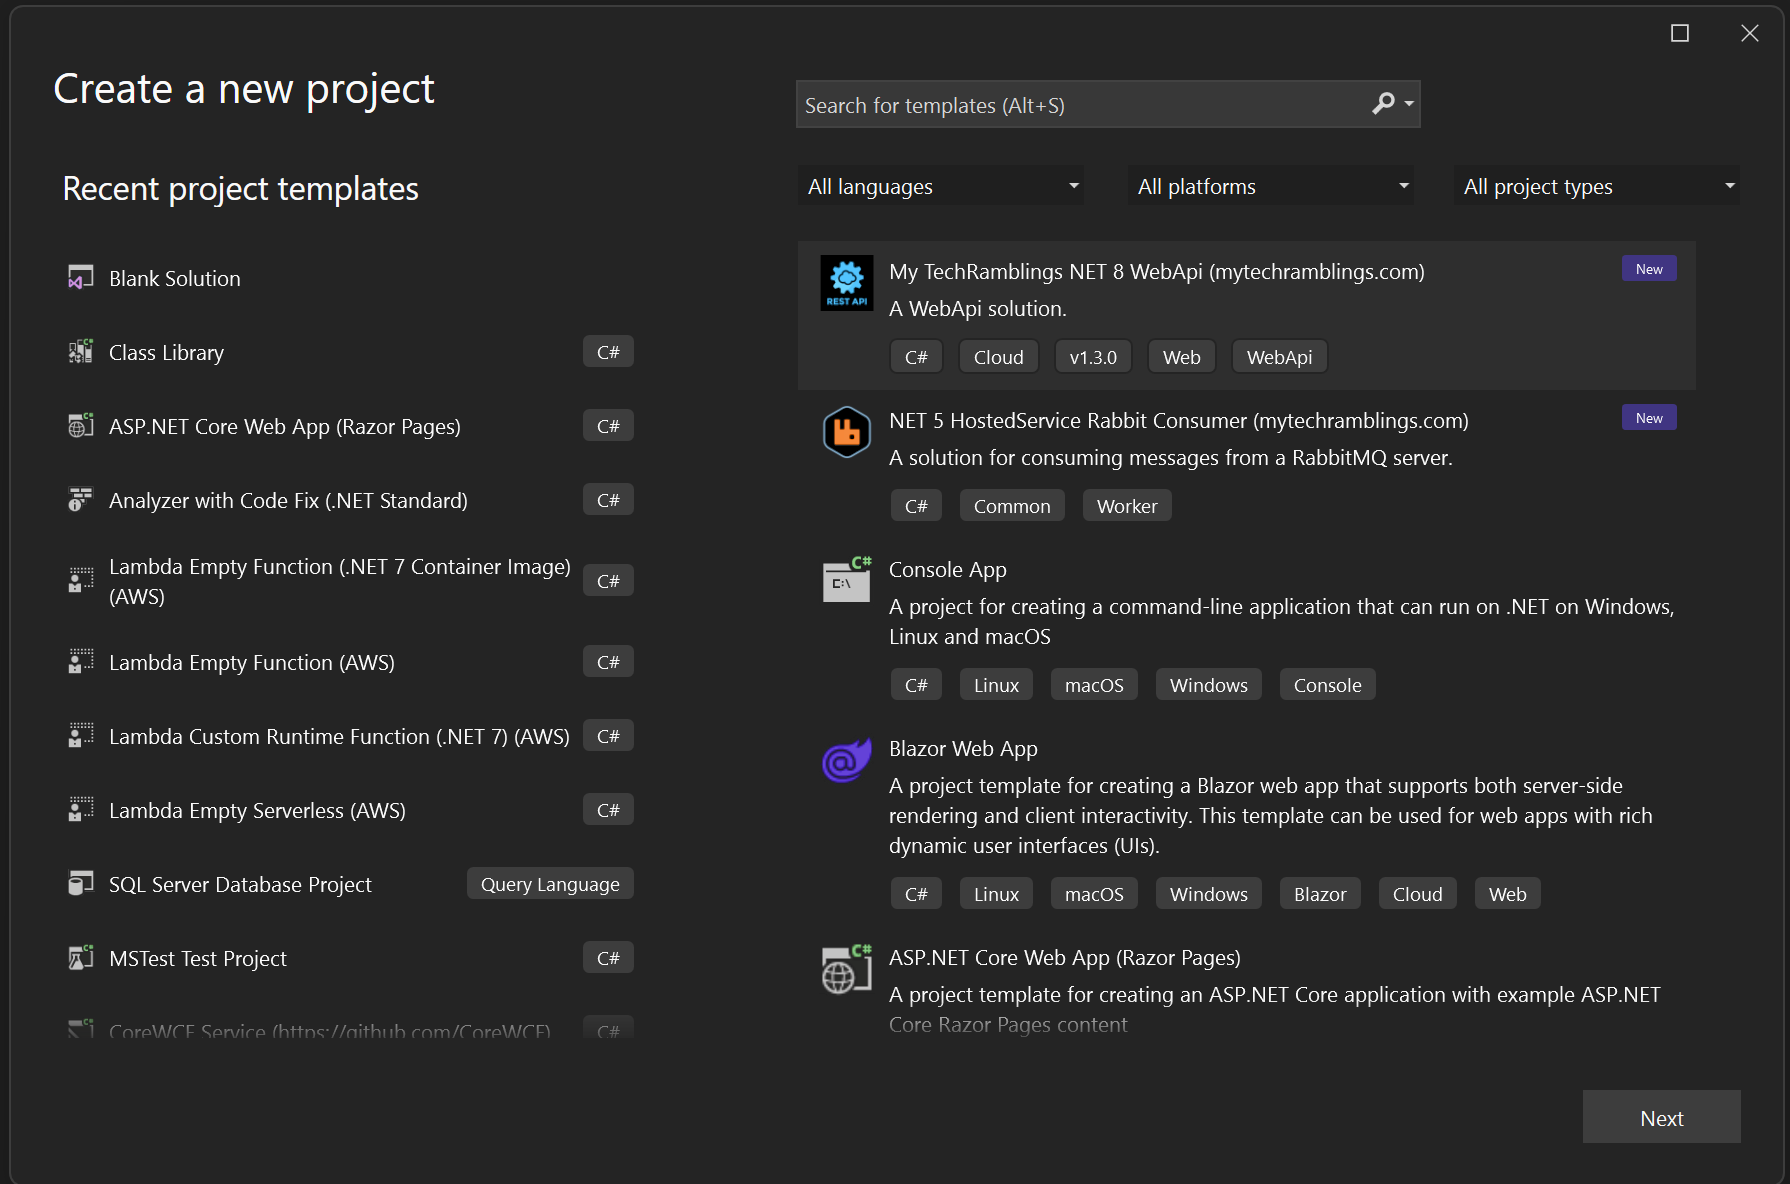
Add the template package version as a classification tag
When creating your template package, include the package version as a classification tag in every .template.config file. This becomes especially useful when you can’t recall the specific version of the package template installed on your machine.
This step can be automated in a dozen different ways, making it a straightforward process.
The .template.config file should end up looking like this:
{
    "$schema": "http://json.schemastore.org/template",
    "author": "mytechramblings.com",
    "classifications": [
      "Cloud",
      "Web",
      "WebAPI",
      "v1.3.0"
    ],
    "name": "My TechRamblings NET 8 WebApi",
    "description": "A WebApi solution.",
    ...
}
Now, by simply listing the available templates using the dotnet new list command, you can easily identify which versions of the templates you have installed on your computer.

Centralize the NuGet package versions using a Directory.Packages.props files
This tip applies if you’re building a template that is comprised of multiple projects (e.g., a Clean Architecture template).
Managing dependencies for multi-project templates in the long run, as new package versions become available, can be challenging. It often leads to spending a significant amount of time dealing with projects using different versions of the same package within a single application.
Using this feature in your .NET template, especially if you’re building a multi-project template, is a good idea. Also, it is really easy to implement.
Create a Directory.Packages.props file in the root of your template, similar to the following example:
<Project>
  <ItemGroup Label="Microsoft Nugets">
    <PackageVersion Include="Microsoft.AspNetCore.Authentication.JwtBearer" Version="8.0.0" />
    <PackageVersion Include="Microsoft.Extensions.DependencyInjection.Abstractions" Version="8.0.0" />
    <PackageVersion Include="Microsoft.Extensions.Options.ConfigurationExtensions" Version="8.0.0" />
    <PackageVersion Include="Microsoft.Identity.Web" Version="2.16.0" />
    <PackageVersion Include="Asp.Versioning.Mvc " Version="8.0.0" />
    <PackageVersion Include="Asp.Versioning.Mvc.ApiExplorer" Version="8.0.0" />
    <PackageVersion Include="Microsoft.Extensions.Logging.Abstractions" Version="8.0.0" />
    <PackageVersion Include="System.Text.Json" Version="8.0.0" />
    <PackageVersion Include="System.ComponentModel.Annotations" Version="5.0.0" />
  </ItemGroup>

  <ItemGroup Label="Third party Nugets">
    <PackageVersion Include="AutoMapper" Version="12.0.1" />
    <PackageVersion Include="Swashbuckle.AspNetCore" Version="6.5.0" />
    <PackageVersion Include="Swashbuckle.AspNetCore.Annotations" Version="6.5.0" />
    <PackageVersion Include="Serilog.Sinks.Console" Version="5.0.1" />
    <PackageVersion Include="Hellang.Middleware.ProblemDetails" Version="6.5.1" />
  </ItemGroup>

  <ItemGroup Label="Test Nugets">
    <PackageVersion Include="Microsoft.NET.Test.Sdk" Version="17.8.0"/>
    <PackageVersion Include="Microsoft.AspNetCore.Mvc.Testing" Version="8.0.0" />
    <PackageVersion Include="NSubstitute" Version="5.1.0" />
    <PackageVersion Include="xunit" Version="2.6.3"/>
    <PackageVersion Include="xunit.runner.visualstudio" Version="2.5.5">
      <IncludeAssets>runtime; build; native; contentfiles; analyzers; buildtransitive</IncludeAssets>
      <PrivateAssets>all</PrivateAssets>
     </PackageVersion >
    <PackageVersion Include="coverlet.collector" Version="6.0.0">
      <IncludeAssets>runtime; build; native; contentfiles; analyzers; buildtransitive</IncludeAssets>
      <PrivateAssets>all</PrivateAssets>
    </PackageVersion >
  </ItemGroup>
</Project>
In each project, set the property ManagePackageVersionsCentrally to true and then define which packages from the Directory.Packages.props file you want to use. Here’s an example:
<Project Sdk="Microsoft.NET.Sdk.Web">

  <PropertyGroup>
    <TargetFramework>net8.0</TargetFramework>
    <Nullable>enable</Nullable>
    <ImplicitUsings>enable</ImplicitUsings>
    <InvariantGlobalization>true</InvariantGlobalization>
    <ManagePackageVersionsCentrally>true</ManagePackageVersionsCentrally>
  </PropertyGroup>

	<ItemGroup>
        <PackageReference Include="Asp.Versioning.Mvc.ApiExplorer" />
        <PackageReference Include="Asp.Versioning.Mvc " />
        <PackageReference Include="Microsoft.AspNetCore.Authentication.JwtBearer" />
        <PackageReference Include="Microsoft.Identity.Web" />
        <PackageReference Include="Swashbuckle.AspNetCore" />
        <PackageReference Include="Swashbuckle.AspNetCore.Annotations" />
        <PackageReference Include="Serilog.Sinks.Console" />
        <PackageReference Include="Hellang.Middleware.ProblemDetails" />
	</ItemGroup>

</Project>
Use a Directory.build.props to manage the common properties required in all your projects
This tip, like the last one, applies if you’re building a template that is comprised of multiple projects.
If you take a look at the various projects constituting your .NET template, you will see a set of properties repeated in each of them. For instance, the LangVersion, the Nullable, or the ImplicitUsings property.
It is much better to create a Directory.build.props file at the root level of your template to manage the common settings required in all your projects.
The next code snippet, shows the Directory.build.props file I am currently using for my templates:
<Project>
  <PropertyGroup>
    <TargetFramework>net8.0</TargetFramework>
    <LangVersion>latest</LangVersion>
    <Nullable>enable</Nullable>
    <ImplicitUsings>enable</ImplicitUsings>
    <TreatWarningsAsErrors>True</TreatWarningsAsErrors>
    <IsPackable>false</IsPackable>
    <ManagePackageVersionsCentrally>true</ManagePackageVersionsCentrally>
    <NuGetAuditMode>all</NuGetAuditMode>
    <NuGetAuditLevel>high</NuGetAuditLevel>
  </PropertyGroup>
</Project>
Add Visual Studio support
To use it, you require at least Visual Studio version 16.10 or higher.
Adding support for Visual Studio to your .NET templates is a very useful feature for developers utilizing this IDE, and it is remarkably simple to implement.
Create a file named ide.host.json and place it inside the .template.config folder.
This file specifies which command-line parameters need to appear within a project dialog in Visual Studio when attempting to create a new project.
If you want to know more about setting up the ide.host.json file, I recommend reading one of my posts. Although it’s a bit old, the process of creating .NET templates hasn’t changed significantly during this time.
Every project that constitutes your template should start with the exact same prefix name
When creating a .NET template with multiple projects, each one of them should begin with the exact same prefix name.
Why? Let’s consider building a Clean Architecture API .NET template; the folder structure will look something like this (more or less):
MyTechRamblings.slm
---src
    +---MyTechRamblings.WebAPI
    |   +---MyTechRamblings.WebApi.csproj
    |   +---Program.cs
    |   \---appsettings.json
    +---MyTechRamblings.Application
    |   +---MyTechRamblings.Application.csproj
    +---MyTechRamblings.Core
    |   +---MyTechRamblings.Core.csproj
    |   +--Interfaces
    |   +--Services
    |   \--Aggregates
    \---MyTechRamblings.Infrastructure
        +---MyTechRamblings.Infrastructure.csproj
        \---Data
            +--Queries
            \--AppDbContext.cs
As you can see, the solution (sln), every folder name, and every .csproj file that I have created begins with the “MyTechRamblings” prefix.
This consistency is because I will be utilizing the sourceName property from the template.json file to rename the prefix based on whatever value the user provides when creating a new app using the template.
The sourceName property value is replaced with the value provided by the -n, --name parameter when running a template.
The template engine will look for any occurrence of the name present in the config file and replace it in file names and file contents. If no name is specified by the host, the current directory is used.
Now, imagine that I have finished building my Clean Architecture .NET template and created the template package. The template.json file for this specific template includes the following properties:
{
    ...
    "shortName": "mtr-api",
    "sourceName": "MyTechRamblings"
    ...
}
When creating a new app using the template, I will use the command: dotnet new mtr-api --name Foo. The --name value will replace the “MyTechRamblings” string throughout the template, resulting in the following application:
Foo.slm
---src
    +---Foo.WebAPI
    |   +---Foo.WebApi.csproj
    |   +---Program.cs
    |   \---appsettings.json
    +---Foo.Application
    |   +---Foo.Application.csproj
    +---Foo.Core
    |   +---Foo.Core.csproj
    |   +--Interfaces
    |   +--Services
    |   \--Aggregates
    \---Foo.Infrastructure
        +---Foo.Infrastructure.csproj
        \---Data
            +--Queries
            \--AppDbContext.cs
As you can see, the new application will be completely (and correctly) renamed based on the user input.
Make use of built-in conditional pragmas to enable or disable certain features of the application
Not every application needs to have the same features, and you can control this variability using the built-in conditional pragmas.
Authorization is one of them. Depending on the type of API you’re building, you might need to set authorization or not. To achieve this, you can make use of the dotnet engine’s conditional pragmas.
Let’s see an example. In the template.json file, I declare the symbol Authorization of type bool with the default value of true.
  "Authorization": {
    "type": "parameter",
    "datatype": "bool",
    "defaultValue": "true",
    "description": "Enables the use of authorization with Microsoft.Identity.Web."
  }
Which means:
- If the user sets the value to
false, the template engine needs to remove any auth reference from the solution. - If the user sets this symbol to
true, the template engine needs to keep the auth references.
In the Program.cs file every authorization logic is wrapped by the Authorization conditional.
#if Authorization
using Microsoft.AspNetCore.Authentication.JwtBearer;
using Microsoft.Identity.Web;
#endif

namespace WebApplication
{
    public class Program
    {
        public static void Main(string[] args)
        {
            var builder = WebApplication.CreateBuilder(args);

            builder.Services.AddControllers();
            builder.Services.AddEndpointsApiExplorer();
            builder.Services.AddSwaggerGen();
#if Authorization
            builder.services.AddAuthentication(JwtBearerDefaults.AuthenticationScheme)
                .AddMicrosoftIdentityWebApi(builder.Configuration, "AzureAd");
#endif

            var app = builder.Build();

            if (app.Environment.IsDevelopment())
            {
                app.UseSwagger();
                app.UseSwaggerUI();
            }

            app.UseHttpsRedirection();

#if Authorization
            app.UseAuthentication();
            app.UseAuthorization();
#endif
            app.MapControllers();

            app.Run();
        }
    }
}
Same thing in the appsettings.json file.
{
  //#if (Authorization)
  "AzureAd": {
    "Instance": "https://login.microsoftonline.com/",
    "TenantId": "AAD-TENANT-ID",
    "Domain": "AAD-DOMAIN",
    "ClientId": "AAD-CLIENT-ID",
    "ClientSecret": "AAD-SECRET-VALUE",
    "TokenValidationParameters": {
      "ValidateIssuer": true,
      "ValidIssuer": "https://login.microsoftonline.com/AAD-TENANT-ID/v2.0",
      "ValidateAudience": true,
      "ValidAudiences": [ "AAD-CLIENT-ID" ]
    }
  }
  //#endif
}
And also in the API Controller
#if Authorization
    [Authorize]
#endif
    [ApiVersion("1.0")]
    [ApiController]
    [Route("v{version:apiVersion}/[controller]")]
    [Produces("application/json")]
    public class MyServiceController : ControllerBase
    {
        ...
    }
This is just a simple example of what you can achieve with conditional operators, but they are capable of more things, like excluding files based on a symbol or using a symbol value to compute another one.
If you want to read more about it, the following link is the official documentation:
Try to build a generic enough Dockerfile, and also avoid Container support for .NET SDK
If you’re working mainly with containers, it’s beneficial to include a Dockerfile in your template. Aim to make this Dockerfile generic enough to work with most applications created using the template. The goal is to provide a ready-to-use Dockerfile that requires no modification in most of the cases.
Also, if your company uses some custom elements in their images, such as platform images, ensure to configure them in the Dockerfile.
The following code snippet showcases a Dockerfile from my .NET 6 API template. There are a few interesting things to comment in here:
- Instead of relying on official images, this Dockerfile employs custom platform images.
What’s a platform image?
When talking about containers security on the enterprise one of the best practices is to use your own platform images, those platform images are the base for your company applications.
The point of having a platform image instead of directly using a base image is to ensure that the resulting containers are hardened according to any corporate policies before being deployed to production.
-
To enable the restoration of my private custom NuGet packages, an Azure DevOps Personal Access Token (PAT) must be provided as an argument to the Dockerfile.
-
Every project used in the Dockerfile begins with the prefix name “MyTechRamblings” (see one of my previous tips).
-
The Dockerfile copies the entire solution and then executes the
dotnet restore,dotnet build,dotnet testanddotnet publishcommands.
In a .NET Dockerfile, it is generally recommended to use Docker’s layer caching mechanism to optimize the build process. The idea is to minimize the number of layers that need to be rebuilt when changes are made to your application.
Copying only the .csproj file and restoring packages separately is a common practice because it allows Docker to cache the restored NuGet packages as a separate layer.
If you take a look at the Dockerfile below, I deviate from this approach. I choose to copy everything, as it yields a more generic Dockerfile capable of working with almost every API I create using my .NET template.
FROM mtr.azurecr.io/net6.sdk.base:6.0-bullseye-slim AS build-env
WORKDIR /app

# Get PAT from args
ARG AZDO_PAT

# Setup cred-provider
ENV VSS_NUGET_EXTERNAL_FEED_ENDPOINTS {\"endpointCredentials\": [{\"endpoint\":\"https://mytechramblings.pkgs.visualstudio.com/_packaging/my-feed/nuget/v3/index.json\", \"username\":\"build\", \"password\":\"$AZDO_PAT\"}]}

# Copy everything and restore packages
COPY . ./
RUN dotnet restore -s "https://mytechramblings.pkgs.visualstudio.com/_packaging/my-feed/nuget/v3/index.json" \
    -s "https://api.nuget.org/v3/index.json" \
	--runtime linux-x64

# Build project
RUN dotnet build "./src/MyTechRamblings.WebApi/MyTechRamblings.WebApi.csproj" \
    -c Release \
	--runtime linux-x64 \
	--self-contained true \
	--no-restore

# Test UnitTest project
RUN dotnet test "./test/MyTechRamblings.UnitTests/MyTechRamblings.UnitTests.csproj" \
	--no-restore

# Publish app
RUN dotnet publish "./src/MyTechRamblings.WebApi/MyTechRamblings.WebApi.csproj" \
	-c Release \
	-o /app/publish \
	--no-restore \
	--no-build \
	--self-contained true \
	--runtime linux-x64

# Build runtime image
FROM mtr.azurecr.io/net6.runtime.deps:6.0-bullseye-slim

# Expose port
EXPOSE 8080

# Copy artifact
WORKDIR /app
COPY --from=build-env /app/publish .

# Set entrypoint
ENTRYPOINT ["./MyTechRamblings.WebApi"]
To create a .NET image, you have the option to use Container Support for .NET SDK instead of a Dockerfile. However, I tend to avoid it, mainly because it’s a niche method of creating images that is not widely known.
In contrast, the Dockerfile syntax has become an industry standard known by everyone. Nowadays, almost anyone can read and modify a Dockerfile if needed, regardless of whether they are .NET developers, Python developers, or SysAdmins.
Don’t disable the package dependencies security scan
Since .NET 8, there has been no native method that allows us to analyze security vulnerabilities in the packages used by our applications.
You could use a external tool or utilize the dotnet list package --vulnerable command to generate a list of packages with known vulnerabilities. However, this required a proactive approach, involving either manually running the command, integrating it into your CI/CD pipeline, or executing it through a Git webhook.
With .NET 8, package dependency auditing is integrated by default when dotnet restore is executed. By default, a security audit is performed only for top-level dependencies. You can customize the security auditing according to your company’s needs using the NuGetAudit, NuGetAuditMode and NuGetAuditLevel MSBuild properties.

This is a really nice feature available starting from NuGet 6.8, the .NET 8 SDK, and Visual Studio 2022 17.8.
You can disable it by setting the NuGetAudit property to false, but there is no compelling reason to turn off this feature in your templates.
Personally, I recommend configuring the NuGetAuditMode in a more restrictive manner, ensuring that it audits not only the direct packages but also their transitive dependencies. However, if you find this level of scrutiny to be excessive for your requirements, it is advisable to, at the very least, maintain the default configuration.
Add a preconfigured nuget.config and utilize the packageSourceMapping section
You should always include a nuget.config file in your templates. But even more so if you use a private feed. Creating a new application using a template and getting a dozen package errors, and having to investigate the source of each package, is a hassle.
Another topic you should include in the nuget.config, especially if you work with a private NuGet feed, is the packageSourceMapping section. This section allows us to define the source from which to obtain each of our packages, enhancing security against potential package identity spoofing.
The following code snippet shows an example of a nuget.config where packages with names that start with MTR.* and MyTechRamblings.* are being fetched from my private feed, and the rest from nuget.org.
<?xml version="1.0" encoding="utf-8"?>
<configuration>
  <packageSources>
    <clear />
    <add key="nuget.org" value="https://api.nuget.org/v3/index.json" />
    <add key="mtr-nuget" value="https://mytechramblings.pkgs.visualstudio.com/_packaging/my-feed/nuget/v3/index.json" />
  </packageSources>
  <packageSourceMapping>
    <packageSource key="nuget.org">
      <package pattern="*" />
    </packageSource>
    <packageSource key="mtr-nuget">
      <package pattern="MTR.*" />
      <package pattern="MyTechRamblings.*" />
    </packageSource>
  </packageSourceMapping>
</configuration>
Add your own .editorconfig file
You should include an .editorconfig file in all your .NET templates. It will enable you to maintain a consistent coding style across all your applications. (The same principle applies if you have built any custom Roslyn Analyzer.).
Nothing more to say here.
Prefer controller-based APIs over minimal APIs
This might be a little bit controversial, but when building a .NET API template you don’t know the complexity of the resulting application, and controller-based APIs are by default easier to scale than minimal APIs.
The clear structure and organization of controller-based APIs make it straightforward to add new features and entities without disrupting the existing code. On the other hand, minimal APIs can become increasingly complex and challenging to manage as you add more and more endpoints.
Certainly, there are ways to enhance the structure and organization of minimal API source code, but is it really worth the effort? I don’t think so. If I have to develop a .NET API template that will be used for a wide range of applications, I would unequivocally choose to use a controller-based API.
Always set API Versioning
You should always enable API versioning in your API templates right from the start, don’t assume that your application will always have a single version.
Enabling API versioning is a straightforward process. You simply need to install the Asp.Versioning.Mvc andAsp.Versioning.Mvc.ApiExplorer NuGet packages and configure versioning according to your requirements.
The following code snippet demonstrates how I configure versioning in my templates, but you should customize it based on your specific needs.
public static IServiceCollection AddCustomApiVersioning(this IServiceCollection services)
{
    services
        .AddApiVersioning(opt =>
        {
            opt.ReportApiVersions = true;
            opt.AssumeDefaultVersionWhenUnspecified = true;
            opt.DefaultApiVersion = new ApiVersion(1, 0);
            opt.ApiVersionReader = new UrlSegmentApiVersionReader();
        })
        .AddApiExplorer(options =>
        {
            options.GroupNameFormat = "'v'VVVV";
            options.SubstituteApiVersionInUrl = true;
        });

    return services;
}
Use the default .NET Dependency Injection Container
Is there really any reason why I should use another DI container (e.g. Autofac) that its not the default one? To be honest, I haven’t found one.
Regarding the default DI container, one thing I like to set in my templates is the ValidateScopes and ValidateOnBuild properties to true.
builder.Host.UseDefaultServiceProvider((opt) =>
{
    opt.ValidateScopes = true;
    opt.ValidateOnBuild = true;
});
-
Set the
ValidateOnBuildtotrueto conduct a check ensuring that scoped services are not resolved from the root provider. -
Set the
ValidateOnBuildtotrueto perform a check that verifies that all services can be created during theBuildServiceProvidercall.
This helps enhance the reliability and integrity of your dependency injection configuration.
Add an opinionated deployment pipeline
If possible, incorporate a deployment pipeline into your templates. This will be an opinionated pipeline, as the structures vary significantly based on where you’re deploying the app. Also, if you’re using one VCS or another, the pipeline format and syntax will be entirely different.
However, the goal is to provide a ready-to-use pipeline that, in most cases, requires no modifications and can efficiently deploy your application to whatever place your company deploys their apps.
The following code snippet illustrates an example of a pipeline included in some of my templates. Certain values, such as “azureSubscription”, “appServiceName” or “registryName,” are parameters that need to be provided when creating the app using the dotnet new command.
trigger:
- master

pool:
  vmImage: 'ubuntu-latest'

variables:
  - name: buildConfiguration
    value: 'Release'
  - name: azureSubscription
    value: 'AZURE-SUBSCRIPTION-ENDPOINT-NAME'
  - name: appServiceName
    value: 'APP-SERVICE-NAME'
  - name: registryName
    value: 'ACR-REGISTRY-NAME'

steps:
  - task: AzureCLI@2
    displayName: AZ ACR Login
    inputs:
      azureSubscription: $(azureSubscription)
      scriptType: 'bash'
      scriptLocation: 'inlineScript'
      inlineScript: 'az acr login --name $(registryName)'

  - task: AzureCLI@2
    displayName: AZ ACR Build
    inputs:
      azureSubscription: $(azureSubscription)
      scriptType: 'bash'
      scriptLocation: 'inlineScript'
      inlineScript: 'az acr build -t ApplicationName:$(Build.BuildId) -t ApplicationName:latest -r $(registryName) -f Dockerfile .'
      useGlobalConfig: true
      workingDirectory: '$(Build.SourcesDirectory)'

  - task: AzureWebAppContainer@1
    displayName: Deploy to App Service
    inputs:
      azureSubscription: '$(azureSubscription)'
      appName: '$(appServiceName)'
      containers: '$(registryName).azurecr.io/ApplicationName:latest'
Do not use Moq in your Unit Tests, consider using NSubstitute or another alternative
Moq is probably the most well-known mocking library for .NET. If you’re not aware, a few months ago, it had some concerning security issues. The most troubling aspect is that these security issues were intentionally introduced into Moq by its creator.
If you want to read more about it, here is a more detailed explanation:
The changes were rolled back after a short period, but why would I use this library after its own creator deliberately opened a security loophole? There are other libraries that perform the same function, allowing me to avoid potential scares in the future.
A good alternative is NSubstitute, and you should consider using it or another option, but my recommendation is to stay away from Moq.
Add a README file with the essential sections
You should absolutely add a README.md into every .NET template. This readme should contains the basic skeleton and sections that the application developer needs to fill out.
This README should feature a clear set of well-defined sections that the developer can populate with pertinent information.
Incorporating a README.md into the template will ensure a consistent format across all your README files, enhancing the overall user experience. Having a standardized format is not only convenient but also contributes to a more cohesive documentation structure.
The next code snippet is an example that could serve as a starting point.
# Welcome to the MyTechRamblings.WebApi documentation
Provide a concise yet informative description outlining the primary functionality and purpose of the MyTechRamblings.WebApi application. This introductory section serves as a quick reference point for developers and users seeking to understand the core aspects of the template.

# Getting Started
To get started with MyTechRamblings.WebApi, follow these steps:

- Clone the repository.
- Navigate to the project directory.
[Include any necessary setup or configuration steps.]

# Documentation
Delve into the specifics with the general documentation for MyTechRamblings.WebApi. This section becomes the go-to resource for understanding the application architecture, components, and overall design philosophy.


## Building Blocks diagram
Include a visual representation of the application's architecture. This diagram acts as a high-level overview, showcasing the key components and their interactions. Utilize tools like draw.io or other diagramming software to create an illustrative and accessible diagram.


## Dependencies
Outline the external dependencies crucial for the proper functioning of MyTechRamblings.WebApi. This could include databases, web services, caching mechanisms, and queues.

## More info.
Offer additional resources and links to related documentation. This could include links to API documentation, user guides, or detailed data models.


## Release Notes
Keep track of the version history in this section, detailing each release's improvements and changes. Highlight notable fixes and commits, providing a clear picture of the template's evolution.

- **Version X.Y.Z**
	- **Notable Fixes and Commits**
		- [ABC-123456] Fix error
		- [ABC-123456] Deprecated
	- **Known Issues**
		- [CRT-123456] Invalid data